 Nextcloud All-in-One Guide
Nextcloud All-in-One (AIO) is a Docker-based project designed to simplify the installation and management of all necessary containers for a full-blown Nextcloud installation. With Nextcloud AIO, you get:
- Nextcloud
- Nextcloud Office
- High-performance backend for Nextcloud Files
- High-performance backend for Nextcloud Talk
- Backup solution (based on BorgBackup)
- Imaginary (for previews of heic, tiff, and webp)
- ClamAV (Antivirus backend for Nextcloud)
- Full-text search
 Prerequisites
- Set up a domain name and configure its DNS so it’s resolvable.
- Create a VPS (Virtual Private Server).
- Ensure that you’re not behind CGNAT, as it won’t work with Nextcloud AIO.
- Prepare to open ports for the guide to work properly.
- For any URL reference, use
nextcloud.your_domain_name.com.
Setup Vultr VM and Setup DNS
![]() Step 1: Sign up for a Vultr account To get started, head over to the Vultr website and sign up for an account. You’ll need to provide some basic information such as your name, email address, and payment information. Once you’ve signed up, log in to your Vultr dashboard.
Step 1: Sign up for a Vultr account To get started, head over to the Vultr website and sign up for an account. You’ll need to provide some basic information such as your name, email address, and payment information. Once you’ve signed up, log in to your Vultr dashboard.
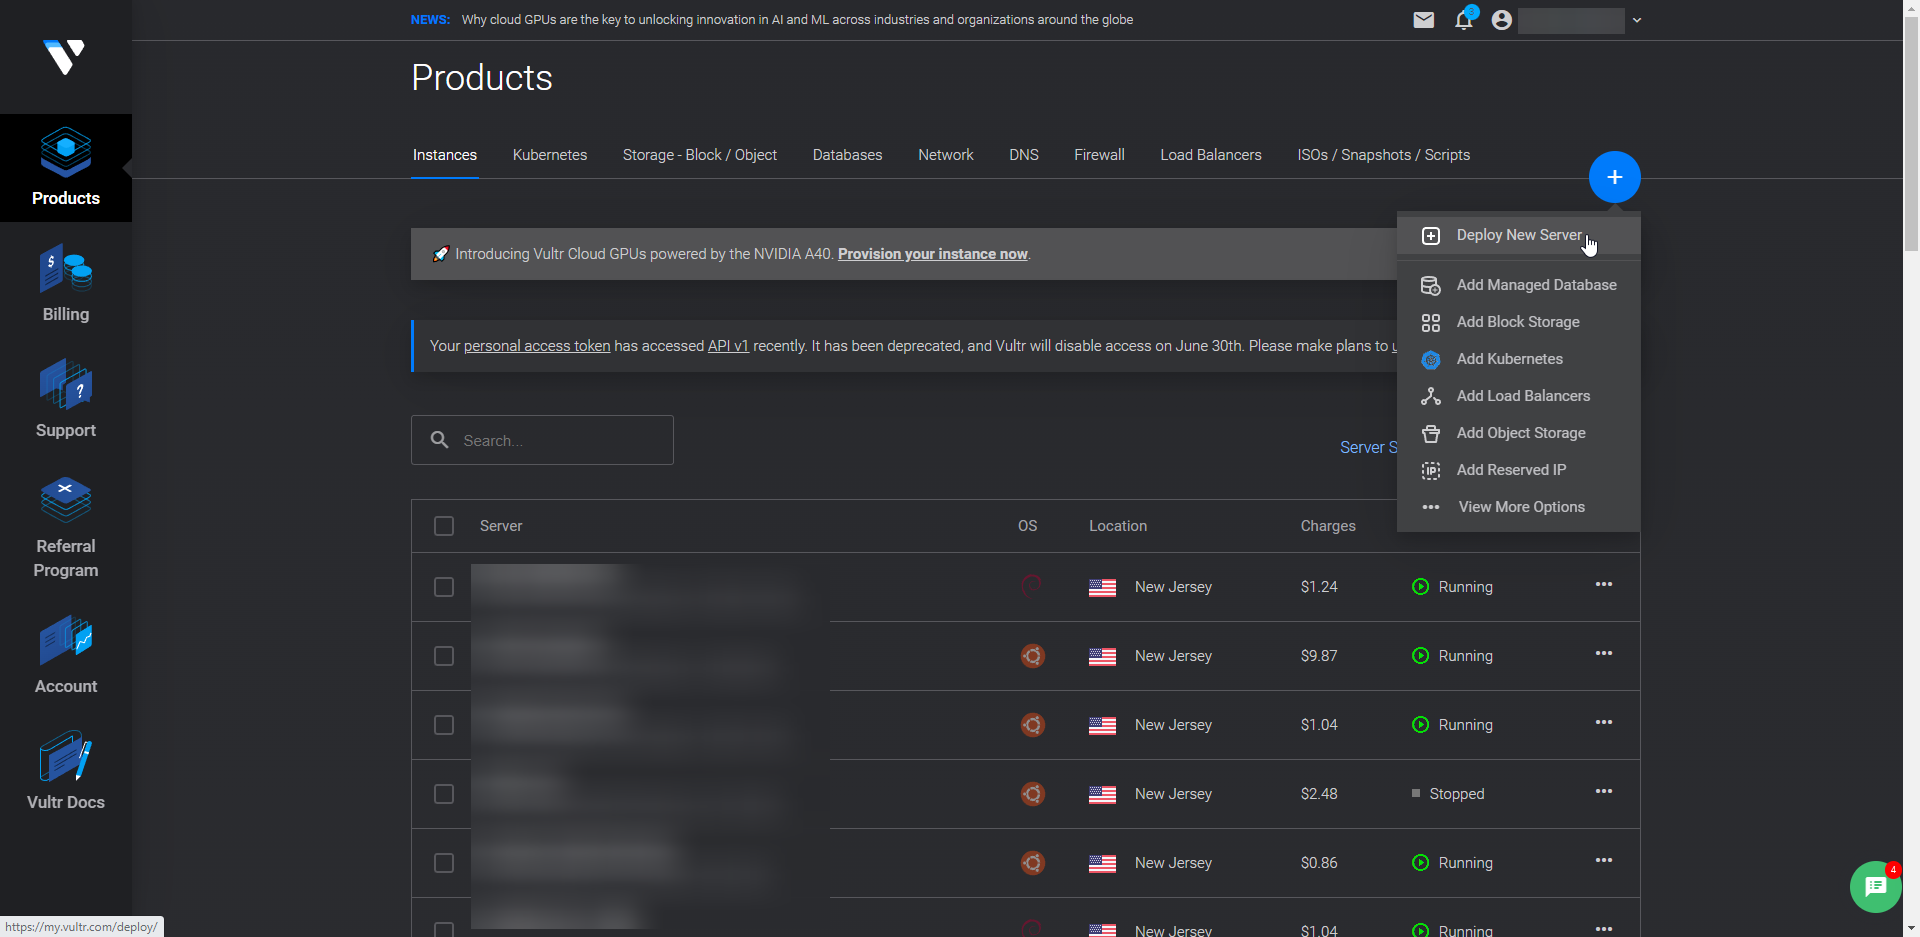
![]() Step 2: Create a new VM Once you’re logged in to your Vultr dashboard, click on the blue “Deploy New Server” button in the top-right corner of the screen.
Step 2: Create a new VM Once you’re logged in to your Vultr dashboard, click on the blue “Deploy New Server” button in the top-right corner of the screen.
![]() Step 3: Choose a “Cloud Compute” and CPU & Storage Technology in this guide I am going to use Intel “Regular Performance”.
Step 3: Choose a “Cloud Compute” and CPU & Storage Technology in this guide I am going to use Intel “Regular Performance”.

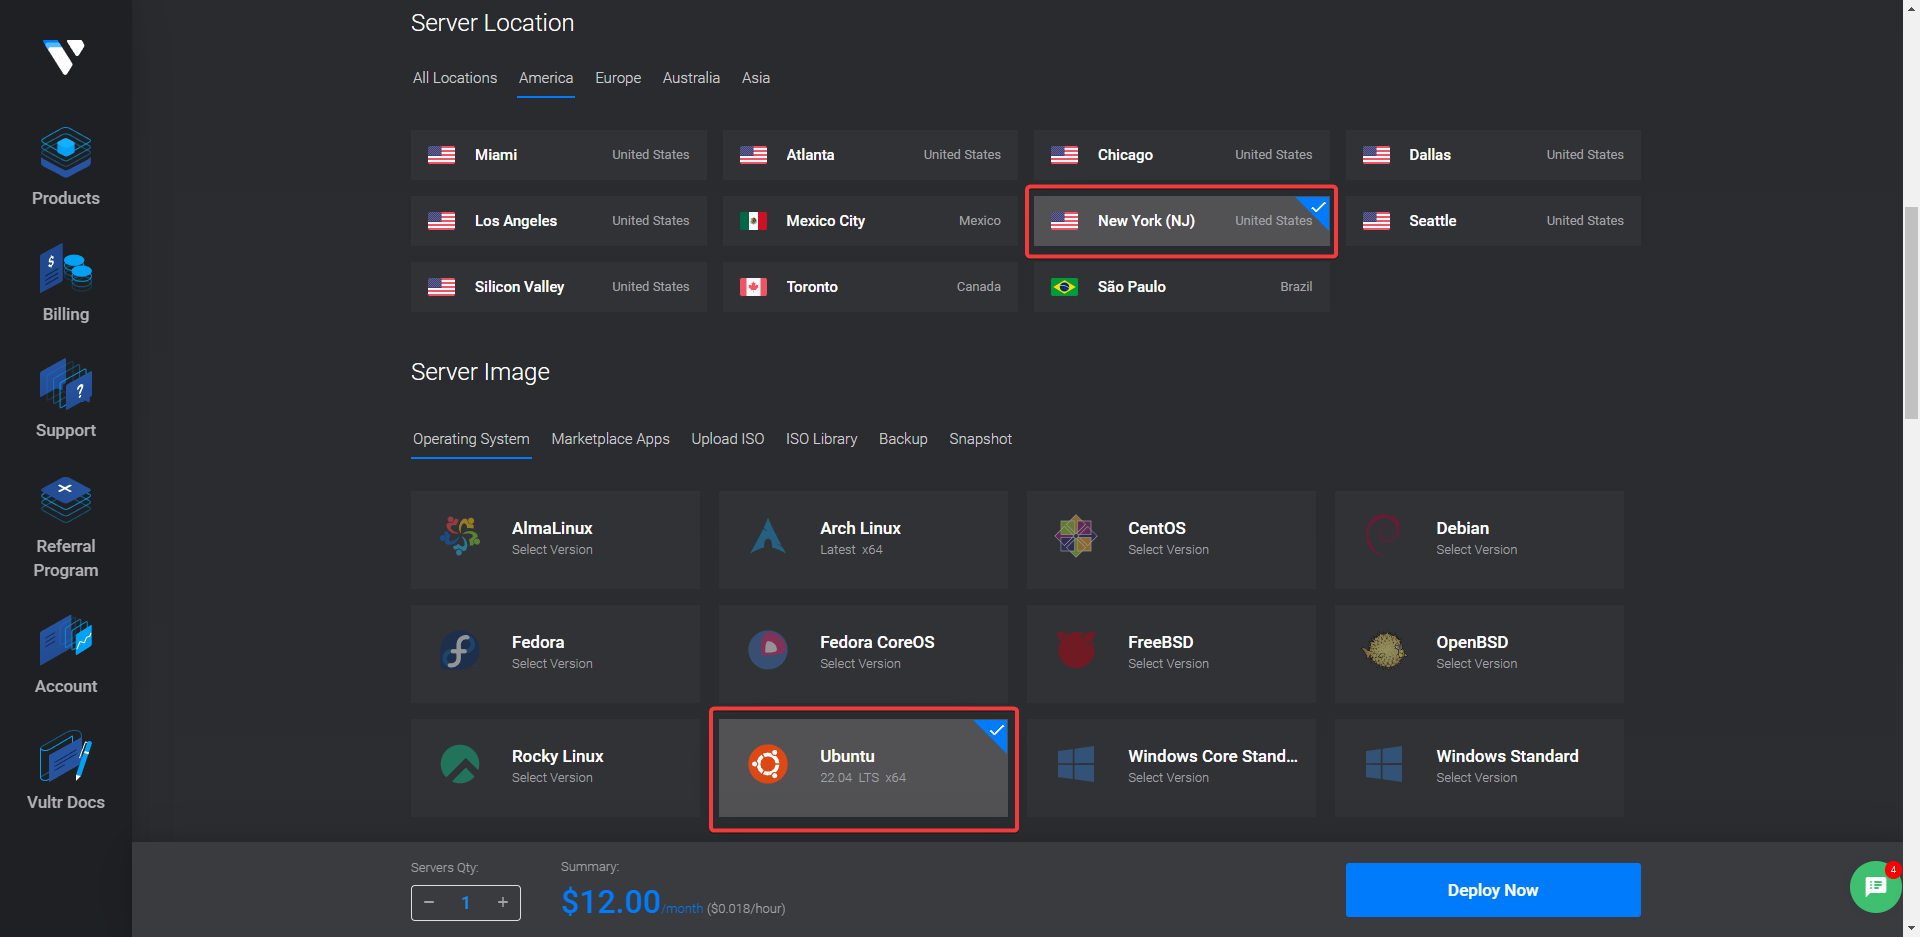
![]() Step 4: Now Choose a server location and type Next, you’ll need to choose a server location and type. Vultr has data centers all around the world, so choose the location that’s closest to your target audience. You’ll also need to choose a server type – for this guide, we recommend using the Ubuntu 20.04 LTS server type.
Step 4: Now Choose a server location and type Next, you’ll need to choose a server location and type. Vultr has data centers all around the world, so choose the location that’s closest to your target audience. You’ll also need to choose a server type – for this guide, we recommend using the Ubuntu 20.04 LTS server type.
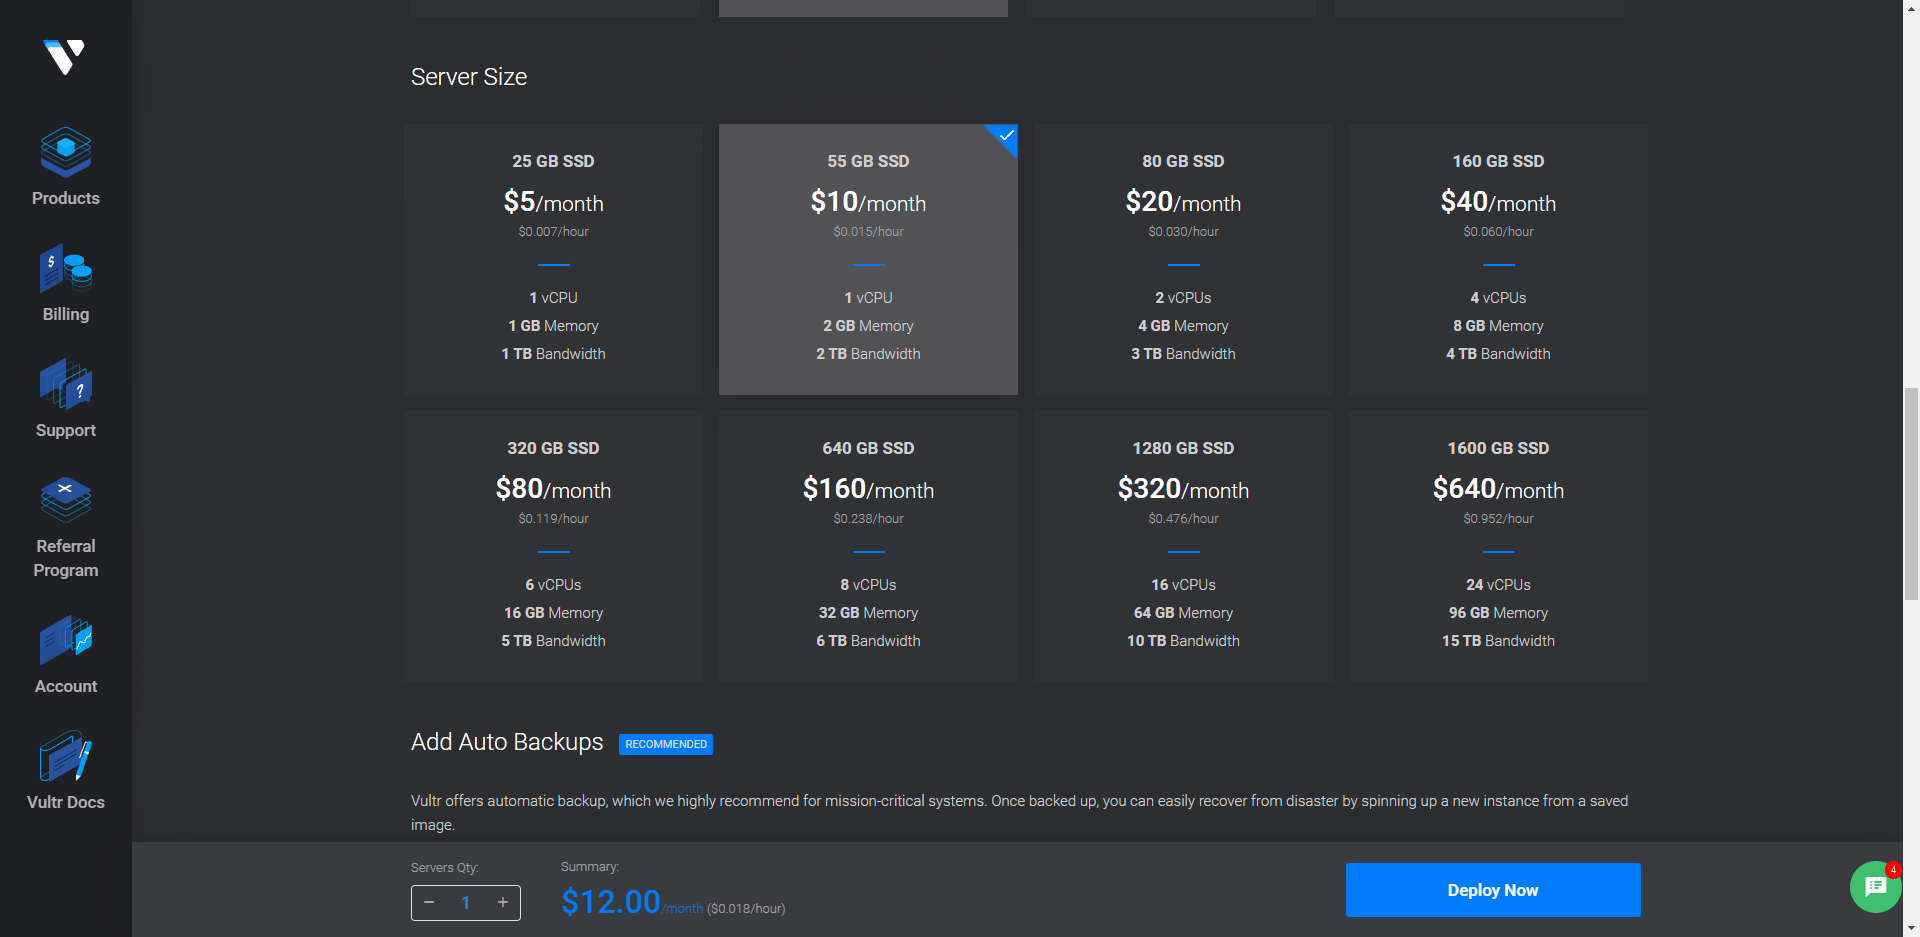
![]() Step 5: For the server size, you can choose any size based on your application requirements. For N8N we recommend 1 – 2 CPU and 2 – 4 GB Memory.
Step 5: For the server size, you can choose any size based on your application requirements. For N8N we recommend 1 – 2 CPU and 2 – 4 GB Memory.
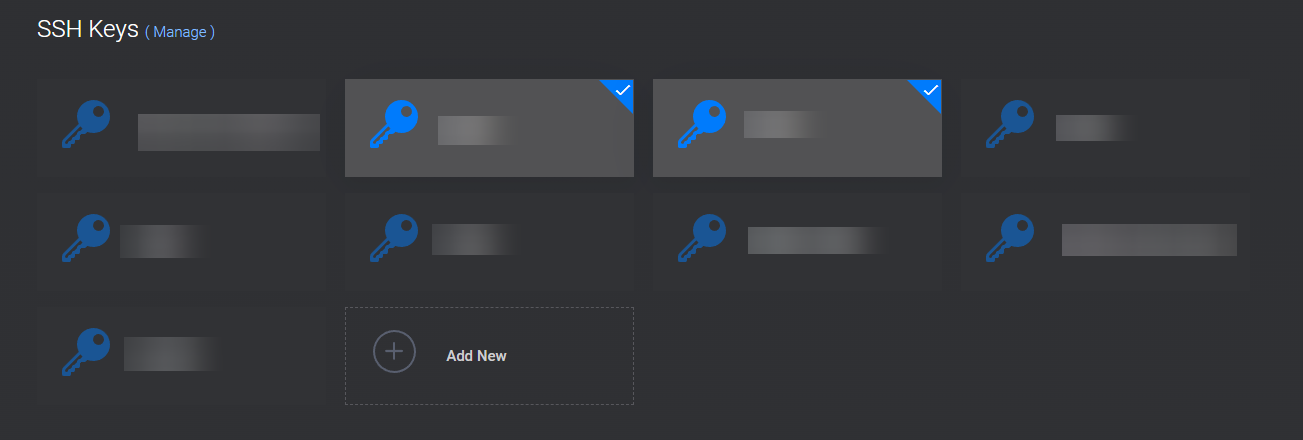
![]() Step 6: Set up SSH keys SSH keys are a more secure way of logging in to your server than using a password. To set up SSH keys, click on the “Add SSH Key” button and follow the instructions.
Step 6: Set up SSH keys SSH keys are a more secure way of logging in to your server than using a password. To set up SSH keys, click on the “Add SSH Key” button and follow the instructions.
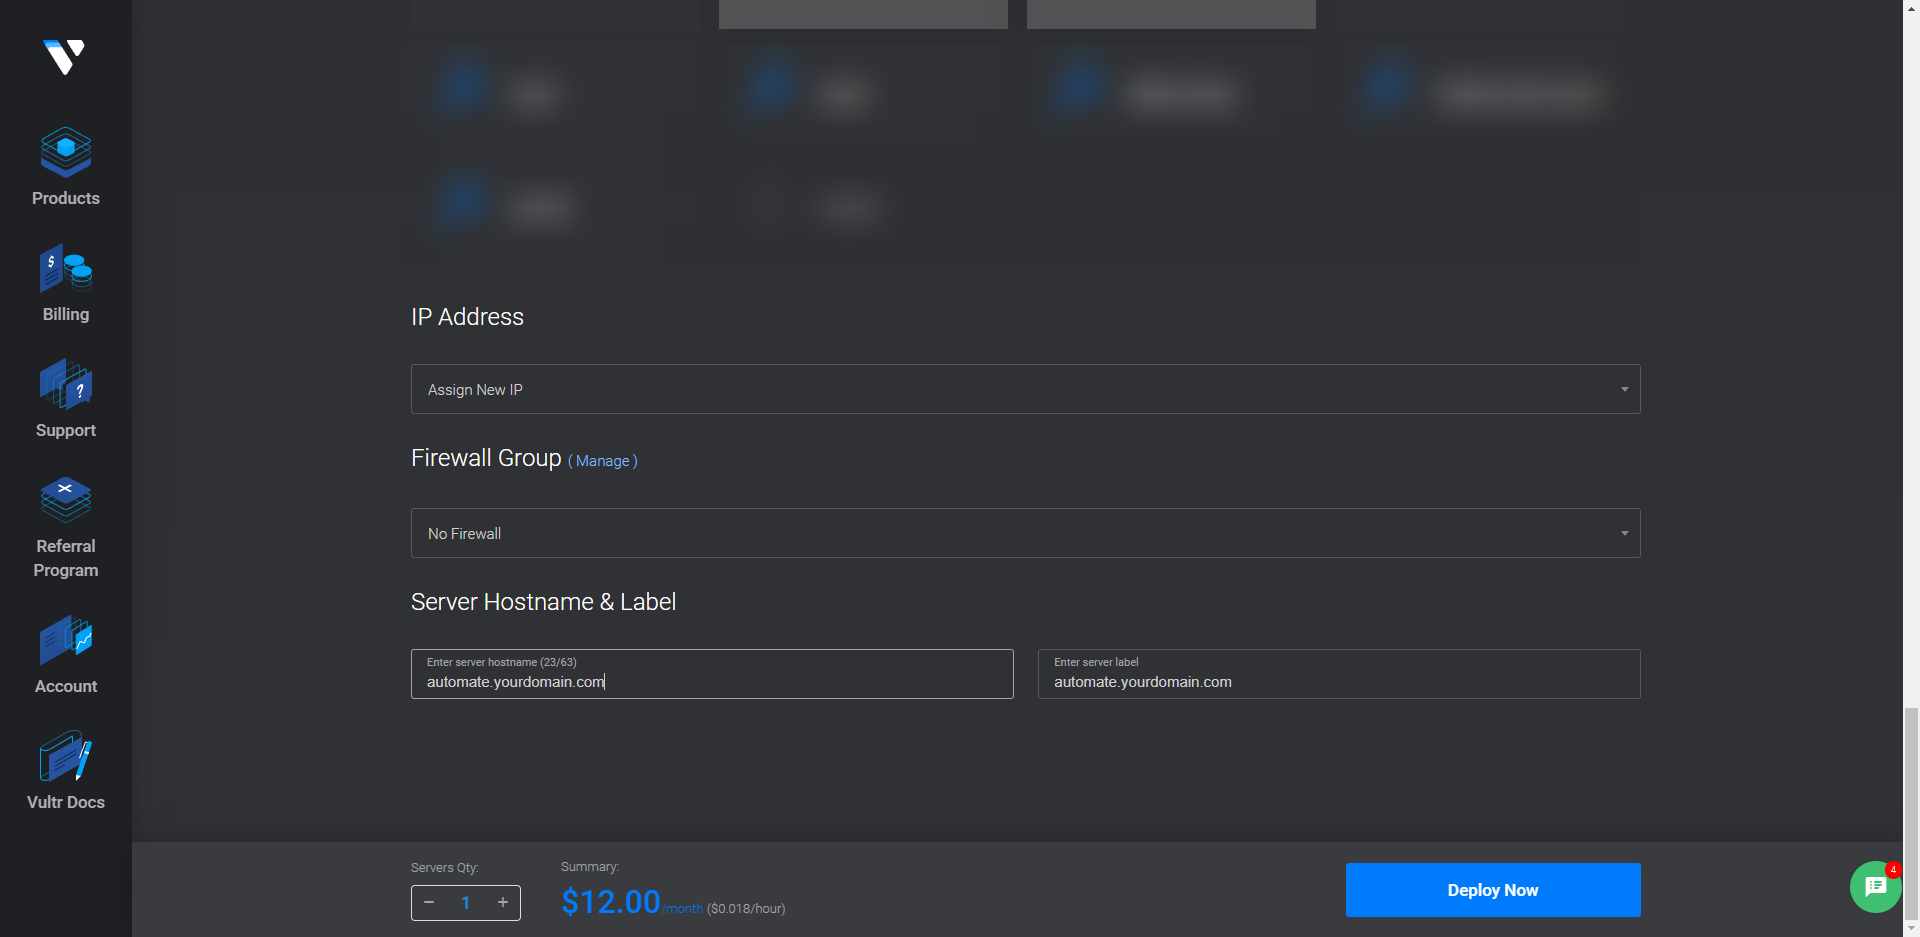
![]() Step 7: Now we want you to set your “Server Hostname & Label” and we recommend something like “automate.your_domain.com” Once that is set Launch the server, and click on the blue “Deploy Now” button to launch the server.
Step 7: Now we want you to set your “Server Hostname & Label” and we recommend something like “automate.your_domain.com” Once that is set Launch the server, and click on the blue “Deploy Now” button to launch the server.
![]() Step 8: Before you continue with the Vultr setup, ensure that your domain’s DNS is correctly configured to point to your Vultr instance. Follow one of the provided SOPs based on your domain registrar or DNS management service:
Step 8: Before you continue with the Vultr setup, ensure that your domain’s DNS is correctly configured to point to your Vultr instance. Follow one of the provided SOPs based on your domain registrar or DNS management service:
- Namecheap: SOP for setting up an A Record in Namecheap
- GoDaddy: SOP for setting up an A Record in GoDaddy
- cPanel: SOP for setting up an A Record in cPanel
- DirectAdmin: SOP for setting up an A Record in DirectAdmin
If you have difficulty following the SOPs or if your domain registrar is not listed, consider searching for a video tutorial or online resources specific to your domain registrar or DNS management service. Your domain should resolve to your Vultr instance before you proceed with the setup. Remember that DNS propagation might take up to 48 hours, although it usually happens much faster. Test your domain by visiting it in a web browser or using a tool like “ping” or “nslookup” to verify that it resolves to the correct IP address.

![]() Step 9: Connect to the server via SSH. Now that your server is up and running, it’s time to connect to it via SSH. You can either use your terminal or follow the steps outlined in this SOP to connect using PuTTY. If you choose the terminal method, open up your terminal and type the following command, replacing ‘your-server-ip’ with the IP address of your server:
Step 9: Connect to the server via SSH. Now that your server is up and running, it’s time to connect to it via SSH. You can either use your terminal or follow the steps outlined in this SOP to connect using PuTTY. If you choose the terminal method, open up your terminal and type the following command, replacing ‘your-server-ip’ with the IP address of your server:
ssh root@your-server-ip
If this is your first time connecting to the server, you may need to confirm the authenticity of the host by typing “yes”.

Setting Timezones
timedatectl
timedatectl list-timezones
sudo timedatectl set-timezone America/New_York
sudo reboot
Note Set it to your own timezone.
Opening Ports
Please refer to the official Github for more information on what is assigned to each port.
sudo ufw enable
sudo ufw allow 80/tcp
sudo ufw allow 443/tcp
sudo ufw allow 8080/tcp
sudo ufw allow 8443/tcp
sudo ufw allow 3478
Install Docker and Run Container
First, use the curl command to install Docker. Then, use the larger command to deploy your instance of NextCloud AIO.
curl -fsSL get.docker.com | sudo sh
For x64 CPUs:
sudo docker run --sig-proxy=false --name nextcloud-aio-mastercontainer --restart always --publish 80:80 --publish 8080:8080 --publish 8443:8443 --volume nextcloud_aio_mastercontainer:/mnt/docker-aio-config --volume /var/run/docker.sock:/var/run/docker.sock:ro nextcloud/all-in-one:latest
Mastercontainer Interface with self-signed certificate (works always, also if only access via IP-address is possible, e.g. https://internal.ip.address:8080/)
8443/TCP: Mastercontainer Interface with valid certificate (only works if port 80 and 8443 are open in your firewall/router and you point a domain to your server. It generates a valid certificate then automatically and access via e.g. https://nextcloud.your.domain:8443/ is possible.)
Open the AIO interface on
https://localhost:8080 or https://the.servers.ip.address:8080. You need to accept the self-signed certificate, afterwards you should see this:
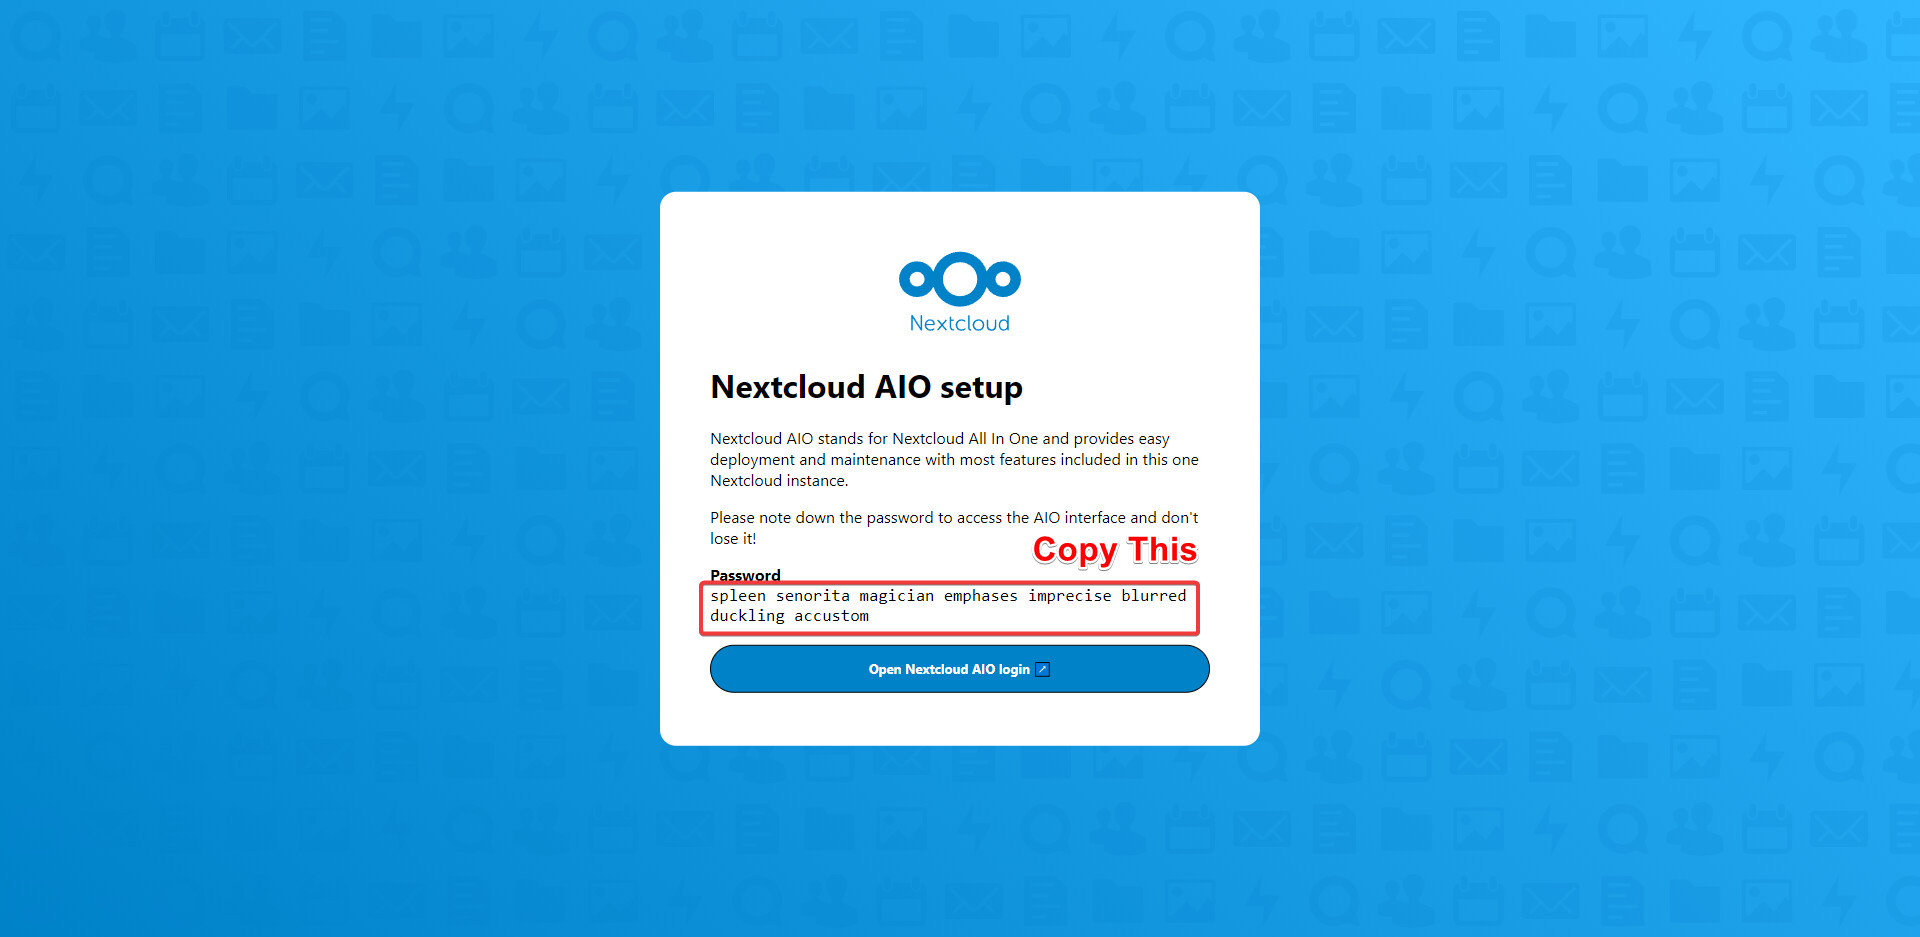
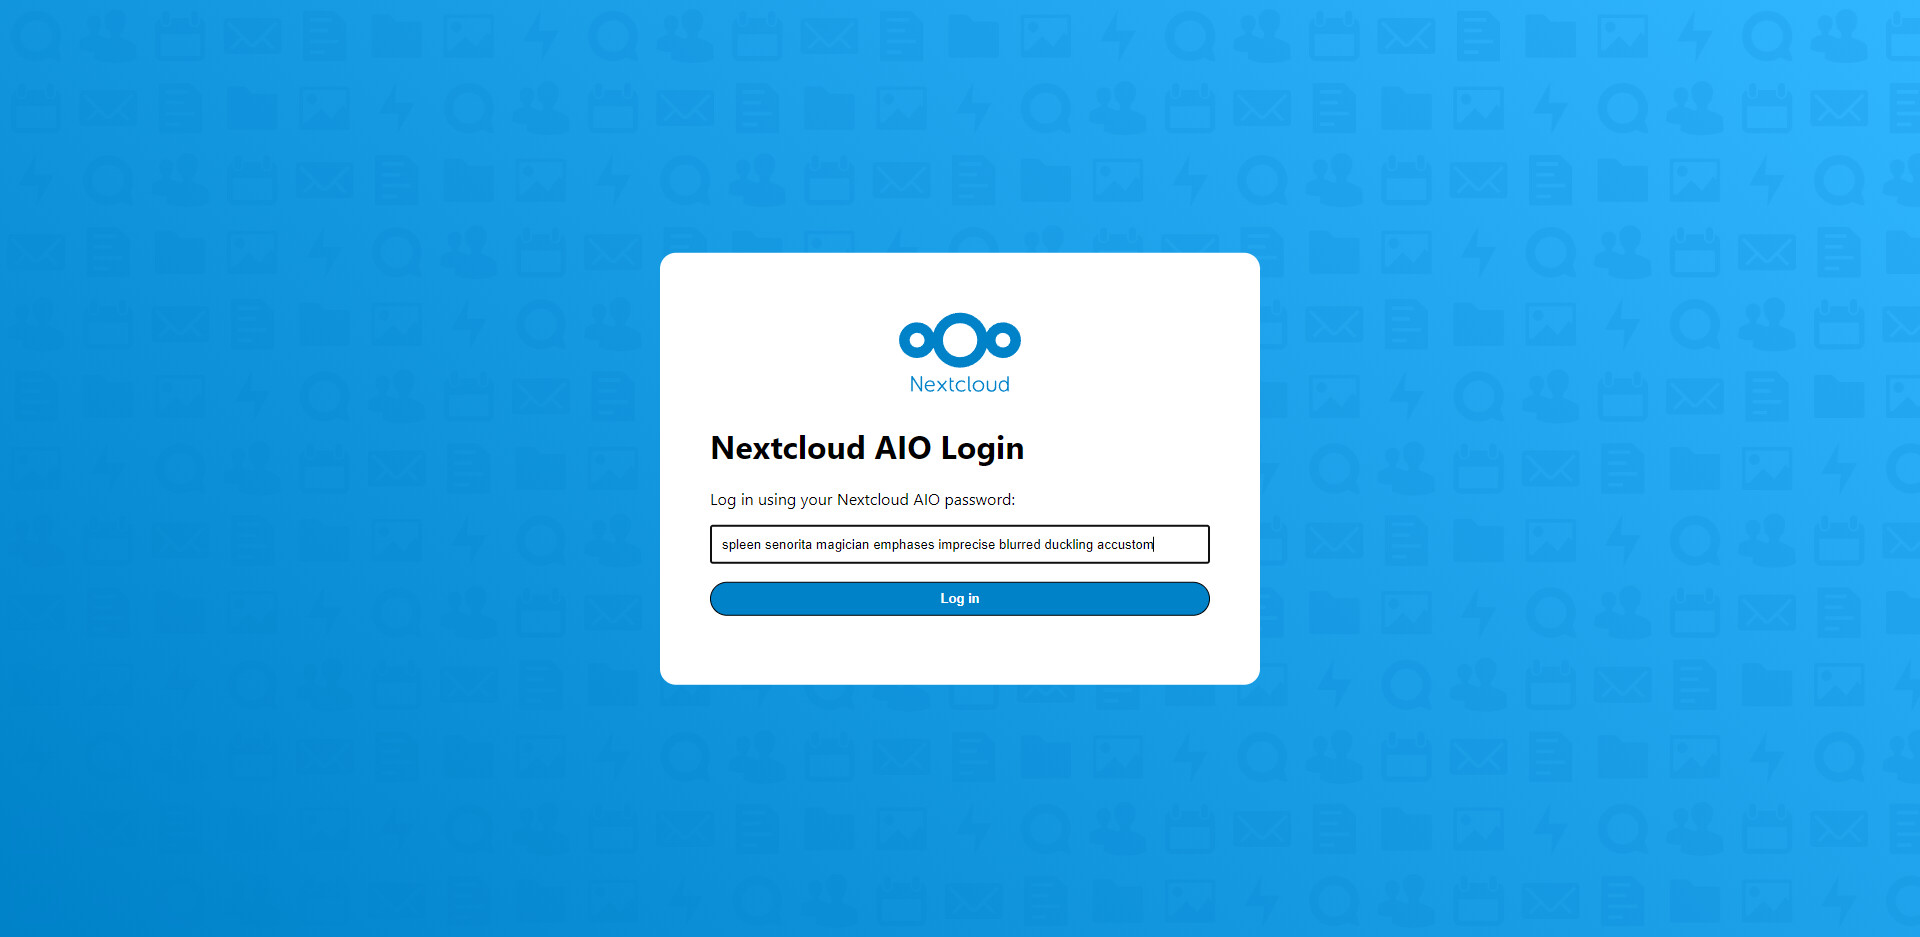
Click on ‘Open Nextcloud AIO login’ and paste in your password:
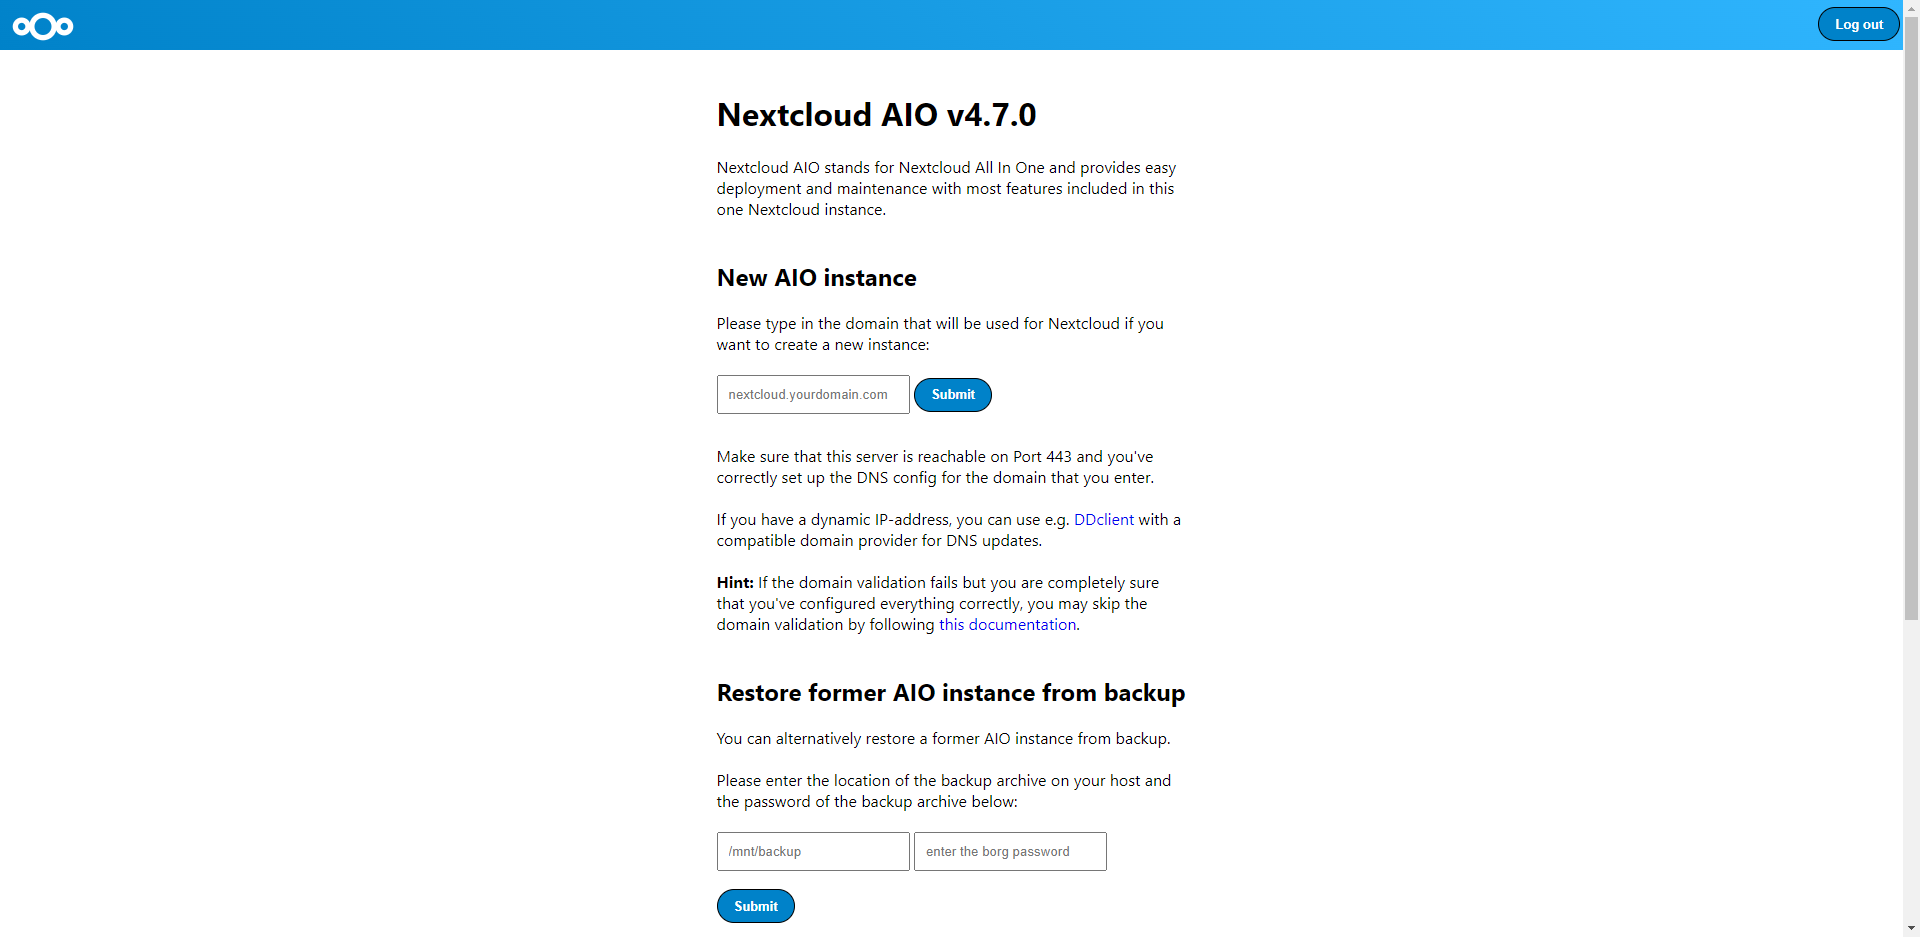
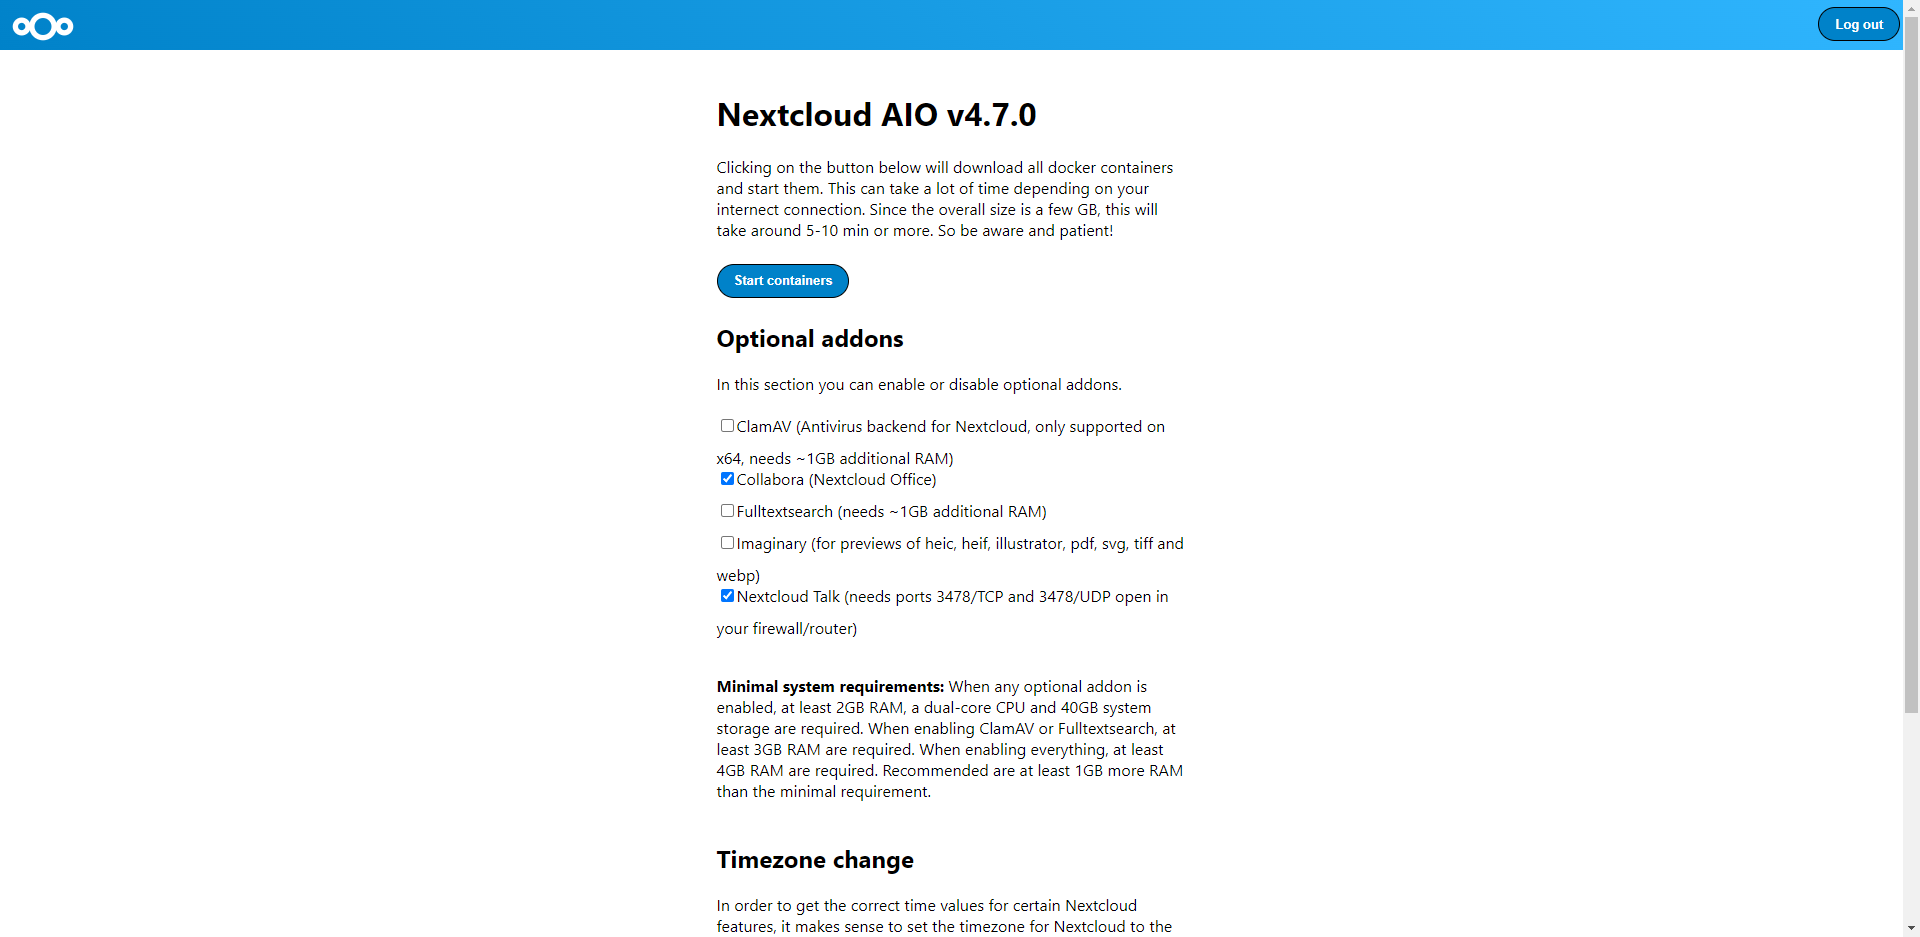
You should see the AIO interface and Add Your Fully Qualified Domain Name and click submit.
After you’ve successfully set up Nextcloud AIO, you can proceed to the next step, where you can configure optional add-ons and the timezone.
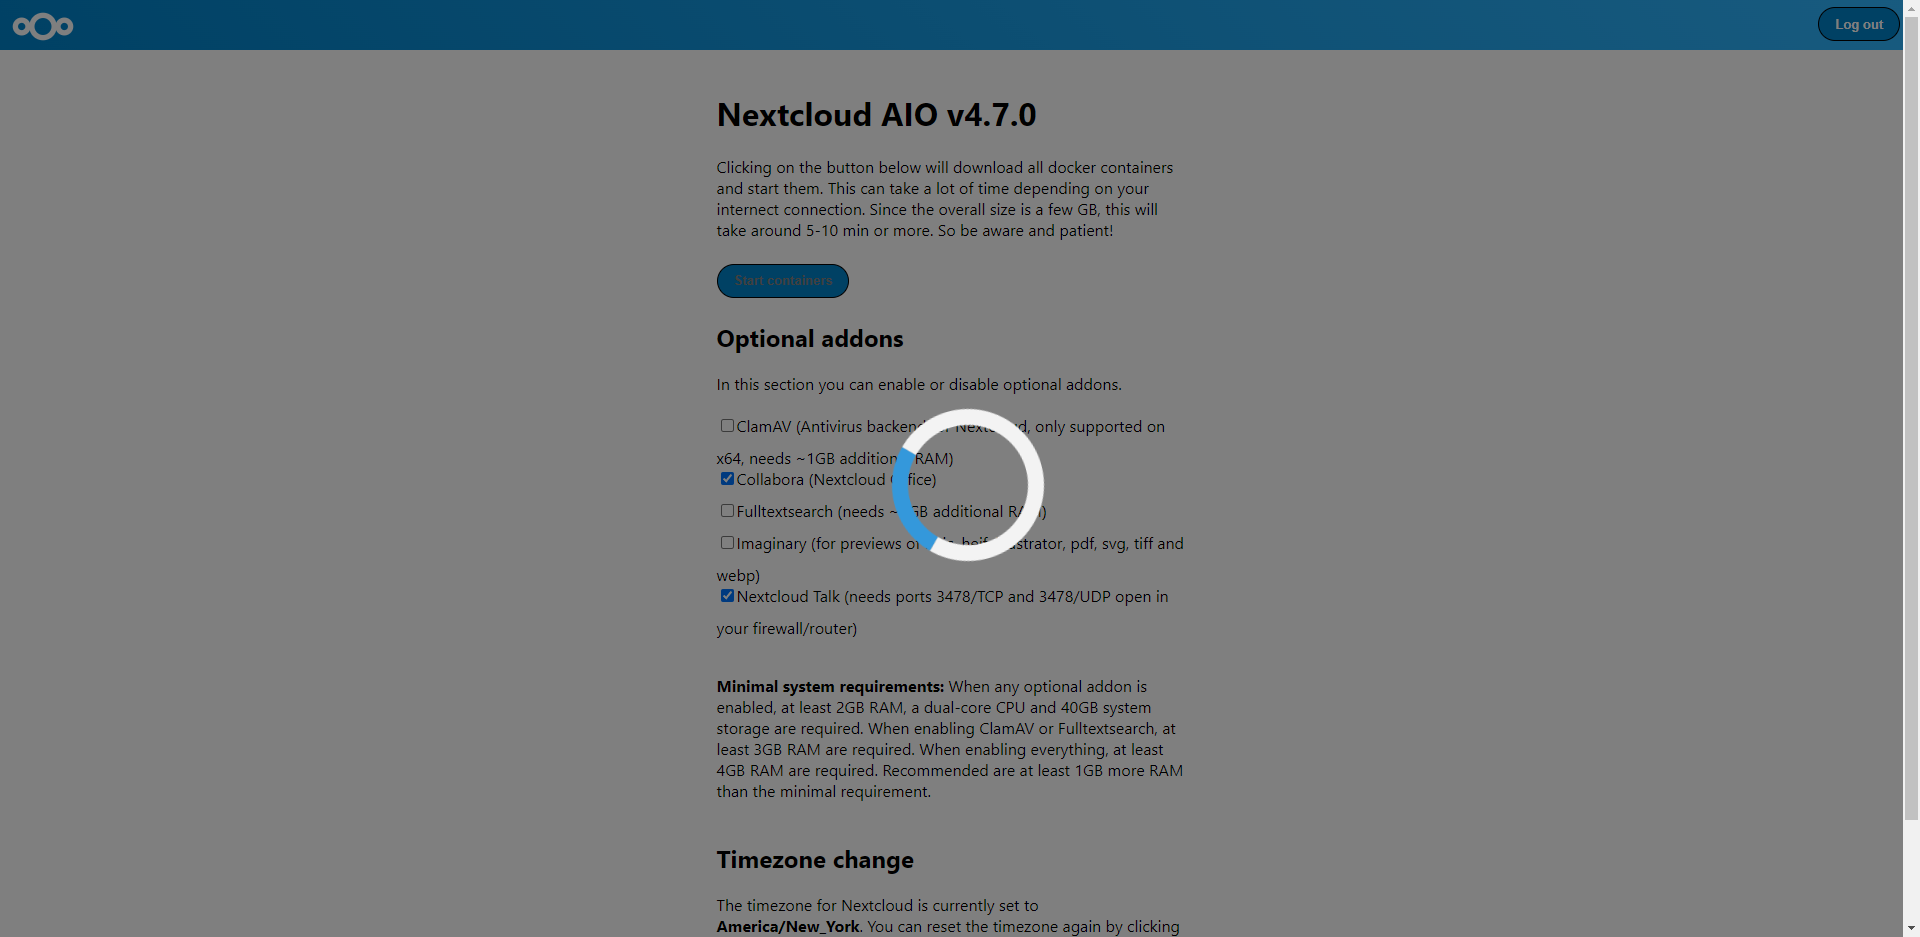
Now, you should see a spinner indicating the progress of the setup process. The duration of this step depends on your internet speed and may take around 10 minutes or more. Patience is Key! ![]()
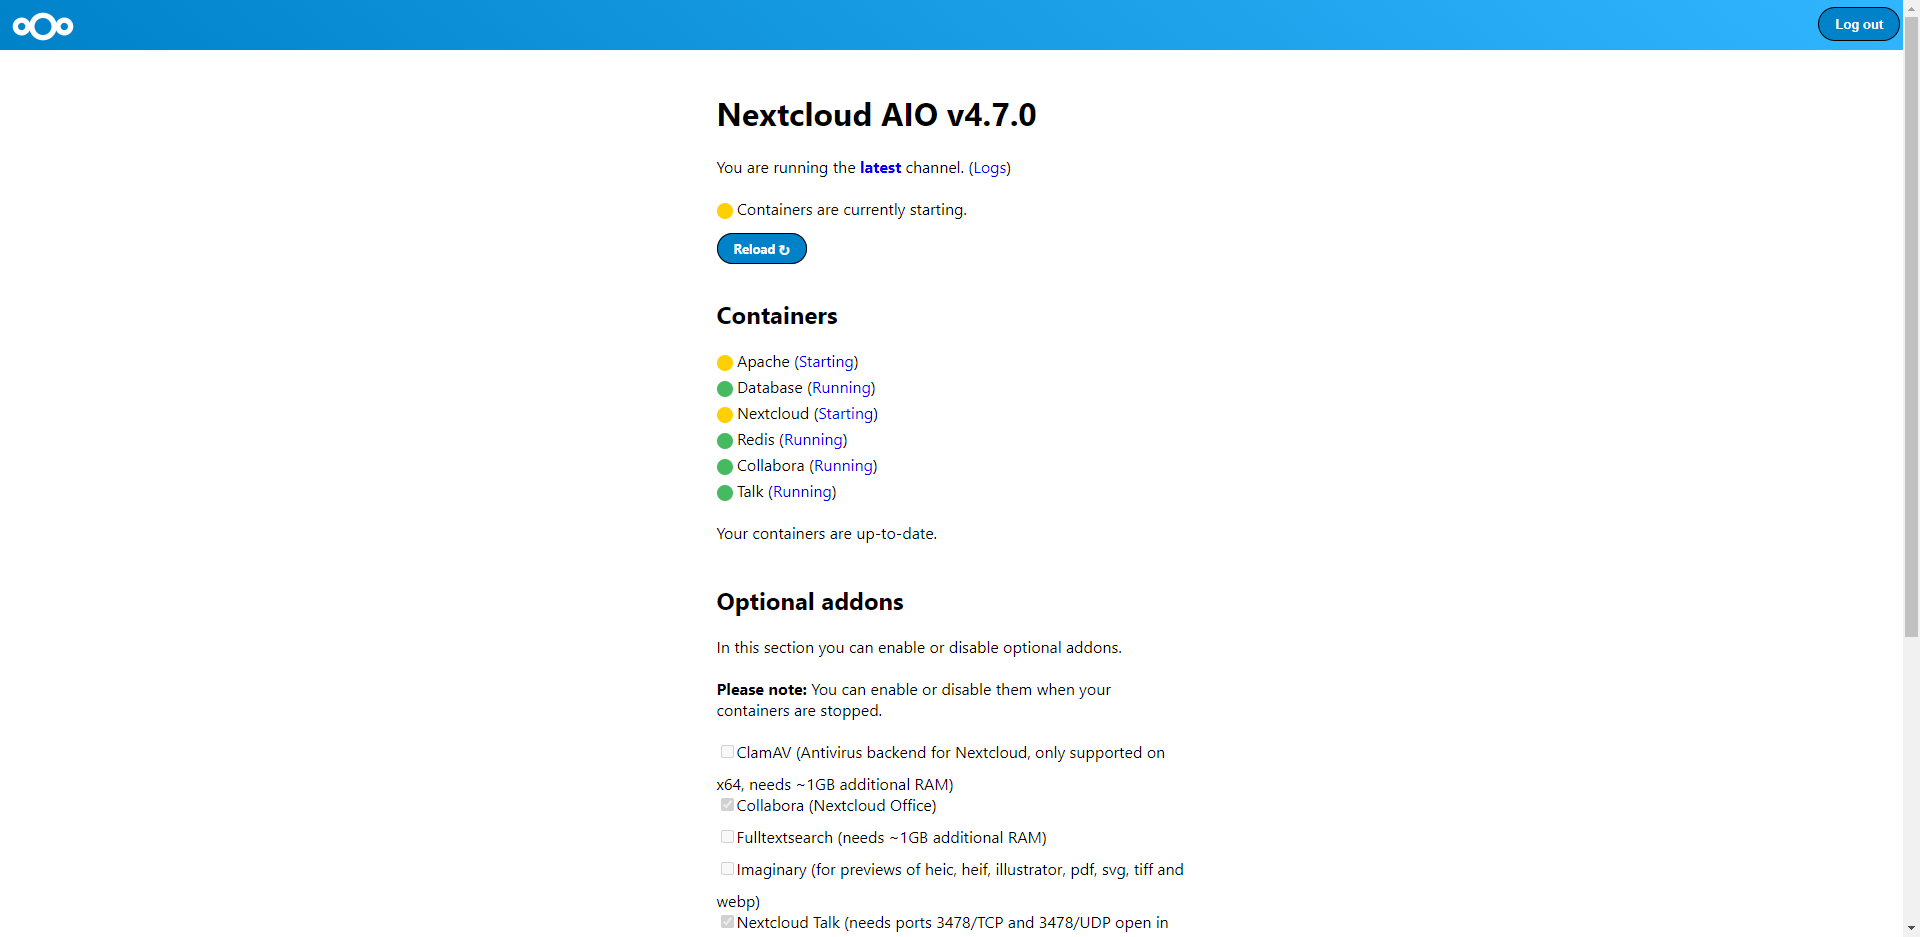
When all containers are downloaded and started, you will see a screen displaying the progress of the containers as they start up and complete the initial installation for you:
When everything is done, you should see the following screen:
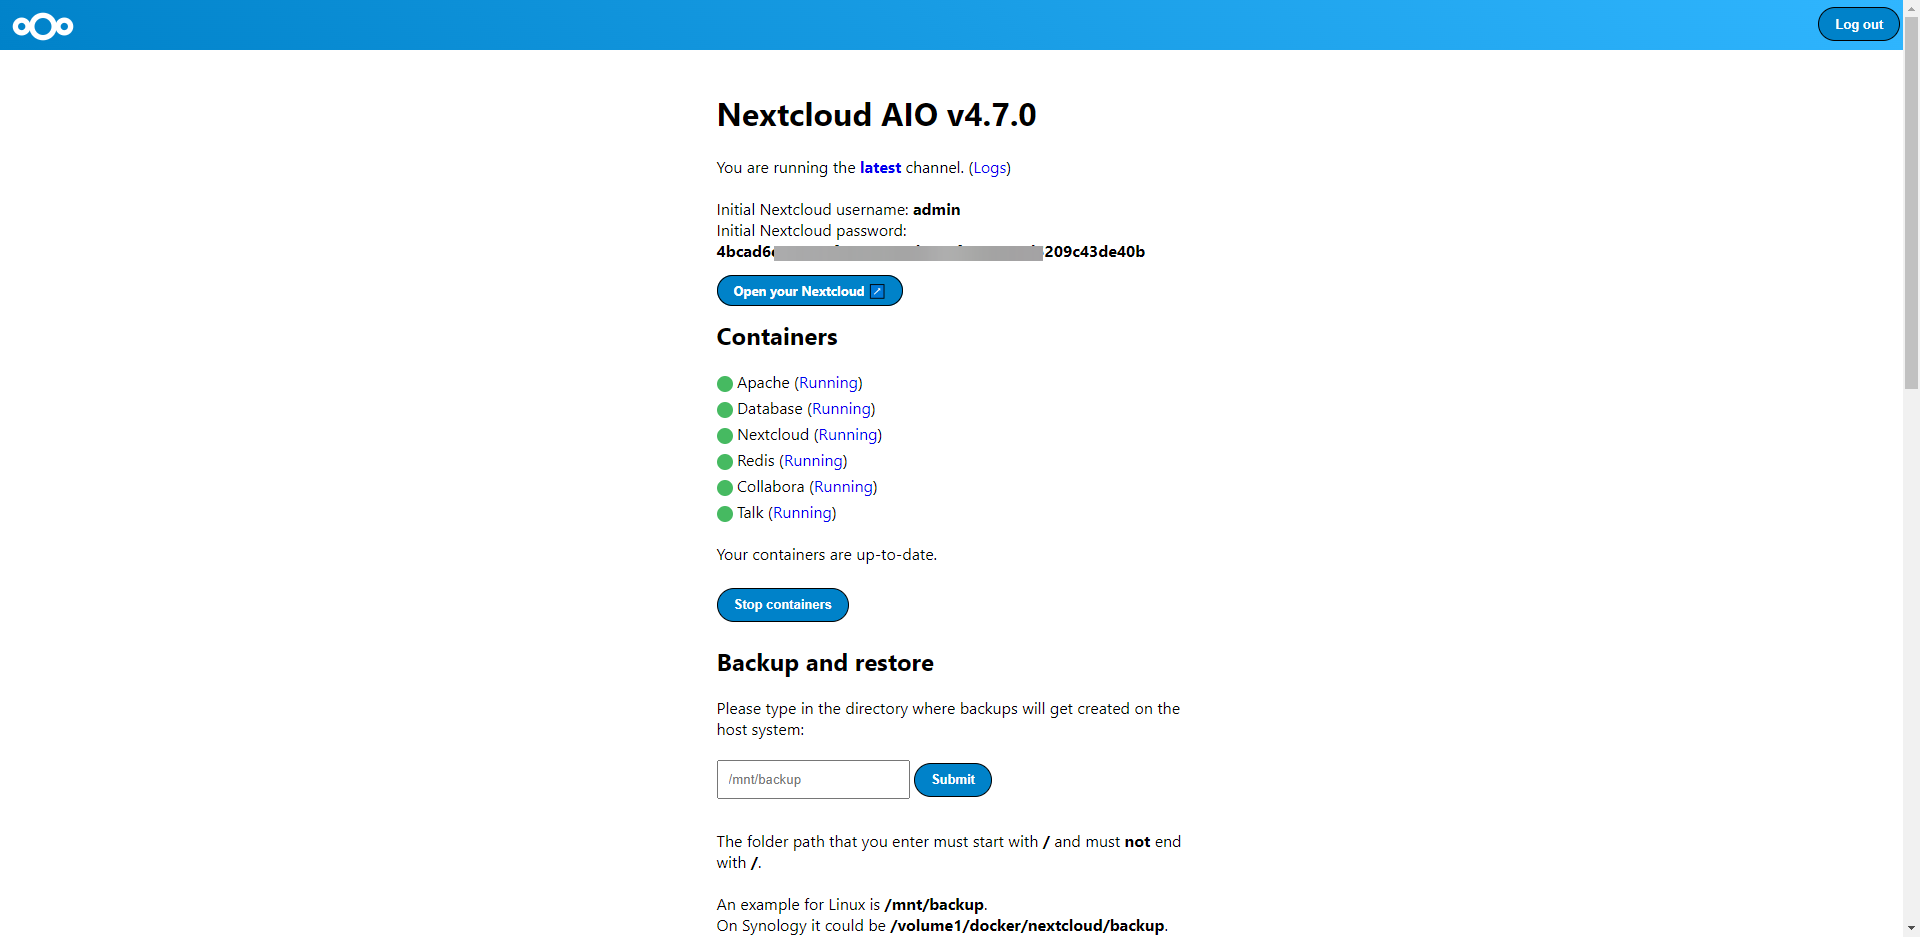
![]() Congratulations! Your Nextcloud AIO server is now up and running!
Congratulations! Your Nextcloud AIO server is now up and running! ![]()
Remember to secure your instance by following best practices, such as regularly updating the server and apps, enabling two-factor authentication, and monitoring logs for any suspicious activity.
Now, you can start enjoying your personal cloud, collaborating with teams, and exploring various apps and integrations that Nextcloud has to offer. Happy clouding! ![]()
![]()