 Overview

N8n (Node8s) is an open-source workflow automation tool that allows you to automate tasks, synchronize data between various services, and more. With a user-friendly interface and numerous integration options, N8n makes it easy to create, customize, and deploy powerful workflows tailored to your specific needs.
Vultr is a cloud hosting provider that offers high-performance SSD cloud servers at an affordable price. Vultr’s flexible infrastructure makes it an ideal choice for deploying applications like N8n.
In this guide, we’ll walk you through the process of installing N8n on a Vultr cloud server.
 Prerequisites
Before you begin the installation process, ensure you have the following prerequisites in place:
- A Vultr account: Sign up for a Vultr account if you don’t have one already. You can register at https://www.vultr.com/.
- A new Vultr instance: Create a new instance on the Vultr platform. We recommend choosing a server with at least 1 GB RAM and running Ubuntu 22.04 LTS as the operating system.
- SSH access: Ensure you have SSH access to your Vultr instance. You can use an SSH client like PuTTY or the terminal in macOS and Linux.
- Domain name (optional): If you want to access N8n using a custom domain, ensure a domain name is registered and its DNS settings are properly configured to point to your Vultr instance.
- Prepare to open ports for the guide to work correctly.
Once you have the prerequisites in place, you’ll be ready to proceed with the installation of N8n on your Vultr cloud server.
![]() Step 1: Sign up for a Vultr account To get started, head over to the Vultr website and sign up for an account. You’ll need to provide some basic information such as your name, email address, and payment information. Once you’ve signed up, log in to your Vultr dashboard.
Step 1: Sign up for a Vultr account To get started, head over to the Vultr website and sign up for an account. You’ll need to provide some basic information such as your name, email address, and payment information. Once you’ve signed up, log in to your Vultr dashboard.
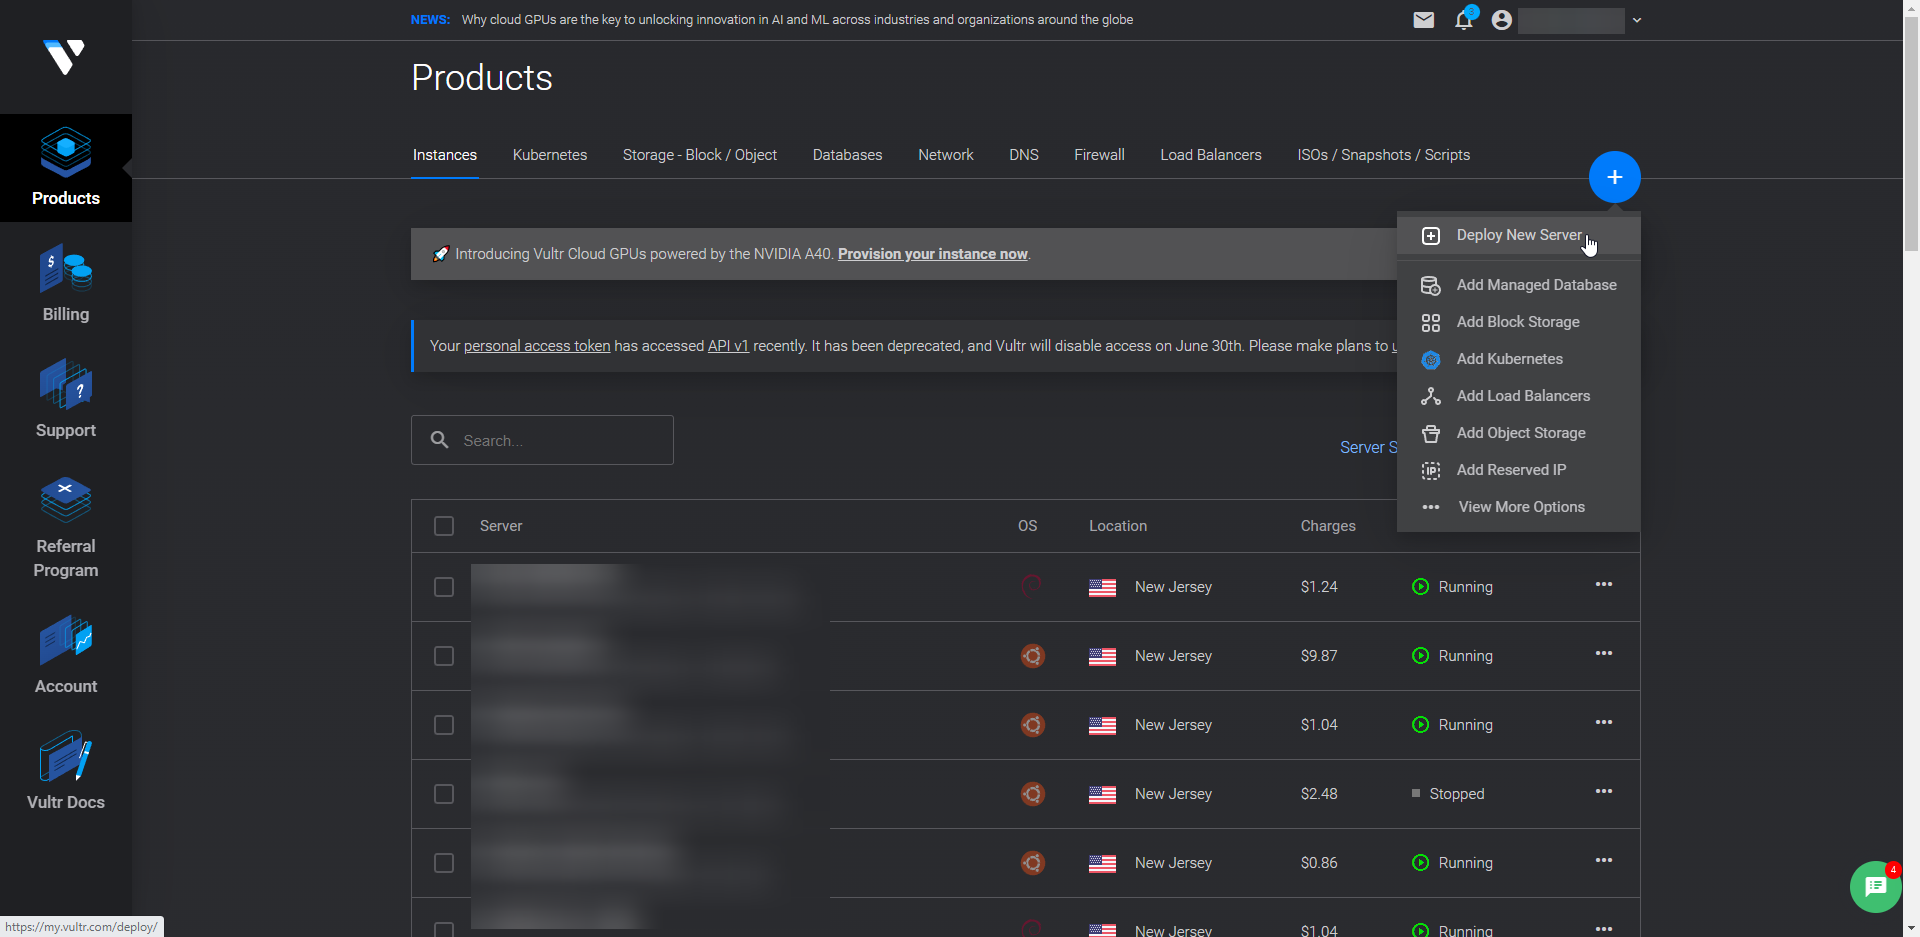
![]() Step 2: Create a new VM Once you’re logged in to your Vultr dashboard, click on the blue “Deploy New Server” button in the top-right corner of the screen.
Step 2: Create a new VM Once you’re logged in to your Vultr dashboard, click on the blue “Deploy New Server” button in the top-right corner of the screen.
![]() Step 3: Choose a “Cloud Compute” and CPU & Storage Technology in this guide I am going to use Intel “Regular Performance”.
Step 3: Choose a “Cloud Compute” and CPU & Storage Technology in this guide I am going to use Intel “Regular Performance”.

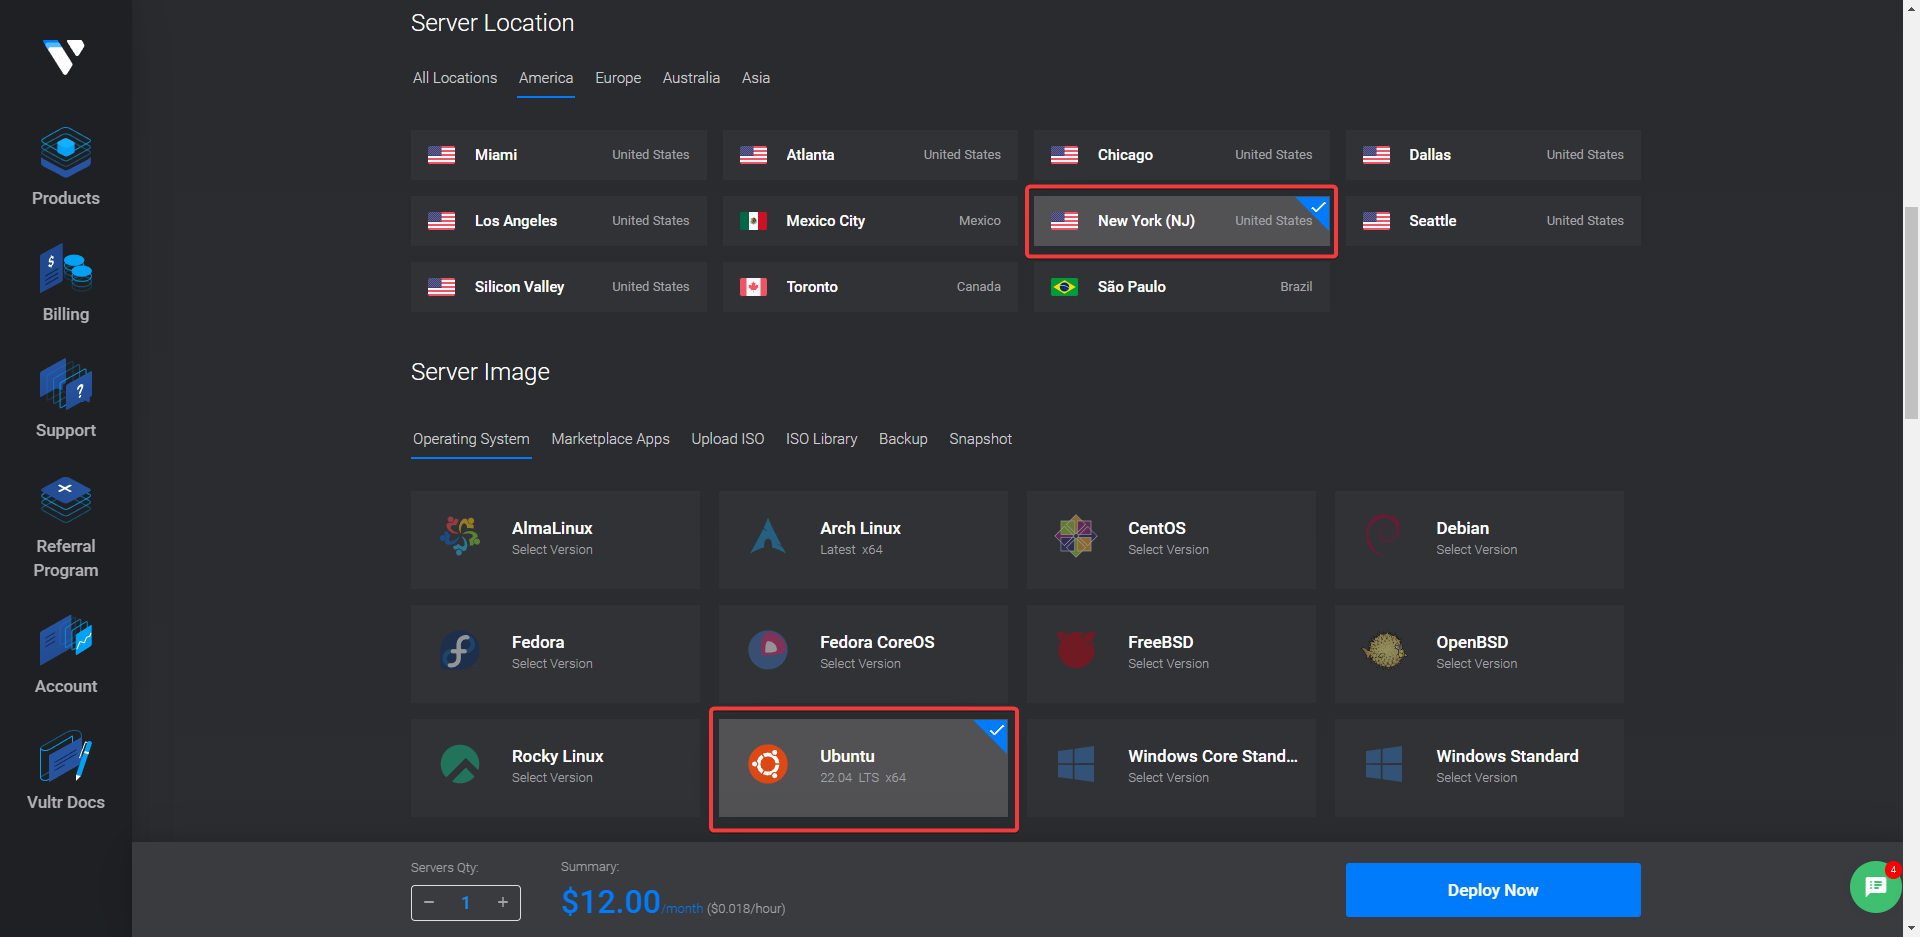
![]() Step 4: Now Choose a server location and type Next, you’ll need to choose a server location and type. Vultr has data centers all around the world, so choose the location that’s closest to your target audience. You’ll also need to choose a server type – for this guide, we recommend using the Ubuntu 20.04 LTS server type.
Step 4: Now Choose a server location and type Next, you’ll need to choose a server location and type. Vultr has data centers all around the world, so choose the location that’s closest to your target audience. You’ll also need to choose a server type – for this guide, we recommend using the Ubuntu 20.04 LTS server type.
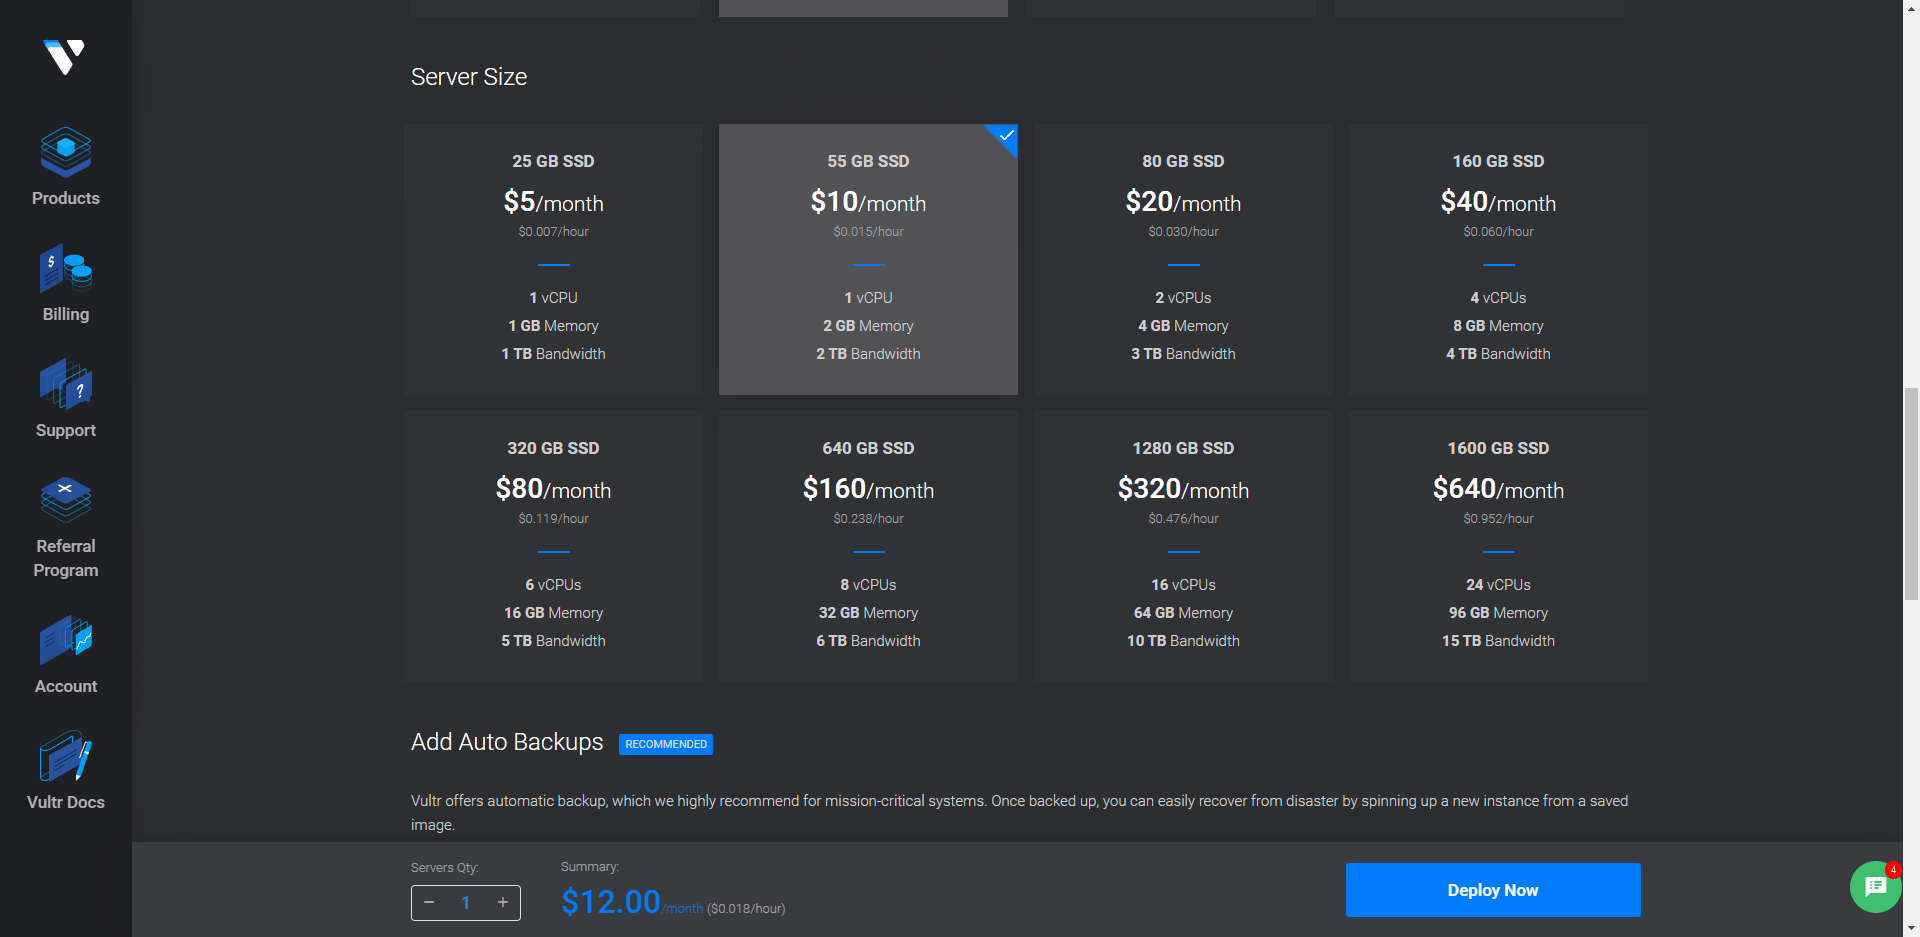
![]() Step 5: For the server size, you can choose any size based on your application requirements. For N8N we recommend 1 – 2 CPU and 2 – 4 GB Memory.
Step 5: For the server size, you can choose any size based on your application requirements. For N8N we recommend 1 – 2 CPU and 2 – 4 GB Memory.
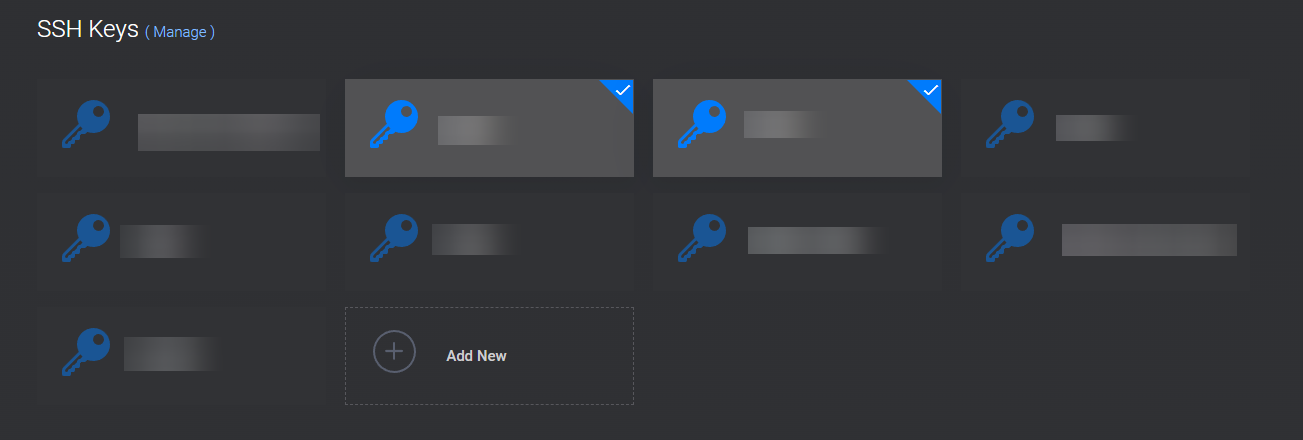
![]() Step 6: Set up SSH keys SSH keys are a more secure way of logging in to your server than using a password. To set up SSH keys, click on the “Add SSH Key” button and follow the instructions.
Step 6: Set up SSH keys SSH keys are a more secure way of logging in to your server than using a password. To set up SSH keys, click on the “Add SSH Key” button and follow the instructions.
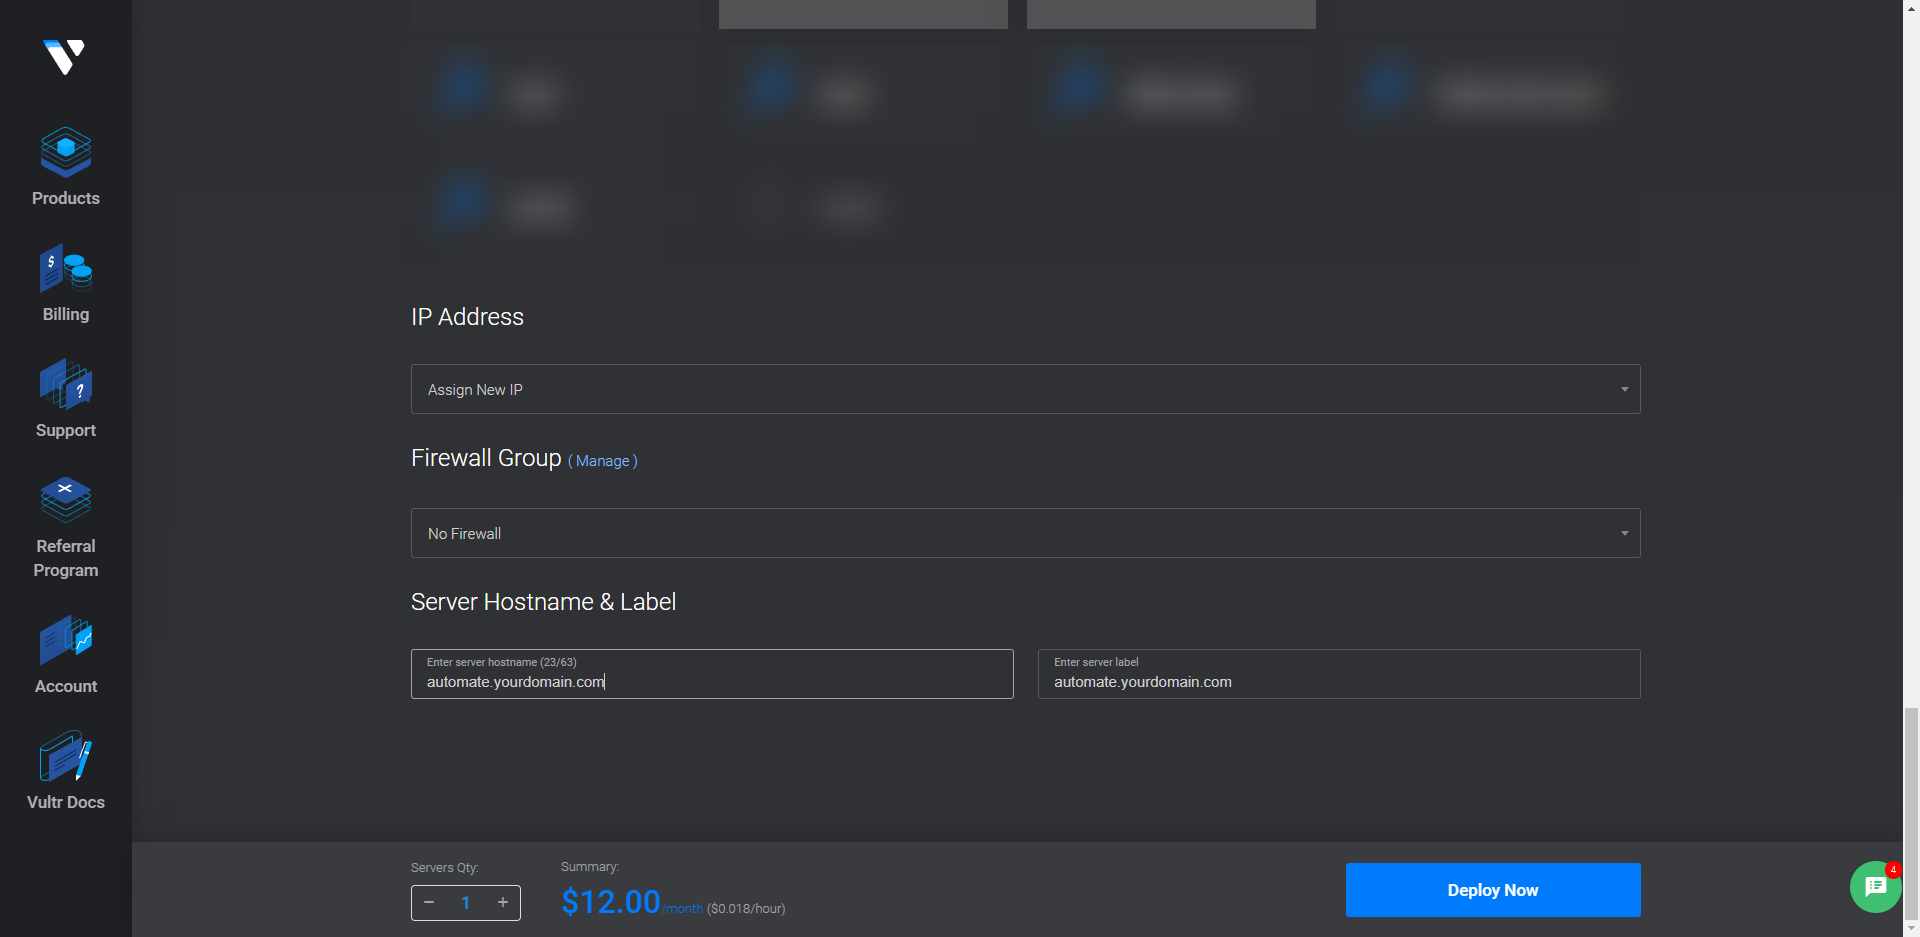
![]() Step 7: Now we want you to set your “Server Hostname & Label” and we recommend something like “automate.your_domain.com” Once that is set Launch the server, and click on the blue “Deploy Now” button to launch the server.
Step 7: Now we want you to set your “Server Hostname & Label” and we recommend something like “automate.your_domain.com” Once that is set Launch the server, and click on the blue “Deploy Now” button to launch the server.
![]() Step 8: Before you continue with the Vultr setup, ensure that your domain’s DNS is correctly configured to point to your Vultr instance. Follow one of the provided SOPs based on your domain registrar or DNS management service:
Step 8: Before you continue with the Vultr setup, ensure that your domain’s DNS is correctly configured to point to your Vultr instance. Follow one of the provided SOPs based on your domain registrar or DNS management service:
- Namecheap: SOP for setting up an A Record in Namecheap
- GoDaddy: SOP for setting up an A Record in GoDaddy
- cPanel: SOP for setting up an A Record in cPanel
- DirectAdmin: SOP for setting up an A Record in DirectAdmin
If you have difficulty following the SOPs or if your domain registrar is not listed, consider searching for a video tutorial or online resources specific to your domain registrar or DNS management service. Your domain should resolve to your Vultr instance before you proceed with the setup. Remember that DNS propagation might take up to 48 hours, although it usually happens much faster. Test your domain by visiting it in a web browser or using a tool like “ping” or “nslookup” to verify that it resolves to the correct IP address.

![]() Step 9: Connect to the server via SSH. Now that your server is up and running, it’s time to connect to it via SSH. You can either use your terminal or follow the steps outlined in this SOP to connect using PuTTY. If you choose the terminal method, open up your terminal and type the following command, replacing ‘your-server-ip’ with the IP address of your server:
Step 9: Connect to the server via SSH. Now that your server is up and running, it’s time to connect to it via SSH. You can either use your terminal or follow the steps outlined in this SOP to connect using PuTTY. If you choose the terminal method, open up your terminal and type the following command, replacing ‘your-server-ip’ with the IP address of your server:
ssh root@your-server-ip
If this is your first time connecting to the server, you may need to confirm the authenticity of the host by typing “yes”.

![]() Step 10: Clone the repository
Step 10: Clone the repository ![]()
git clone GitHub - woakes070048/n8n-docker
![]() Step 11: Change to the n8n-docker directory
Step 11: Change to the n8n-docker directory ![]() ``
``
cd n8n-docker
![]() Step 12: Run the installation script for Docker and Docker Compose
Step 12: Run the installation script for Docker and Docker Compose ![]() ``
``
chmod +x install_docker_compose.sh
./install_docker_compose.sh
![]() Step 13: Copy the .env.example file to .env
Step 13: Copy the .env.example file to .env ![]() ``
``
cp .env.example .env
![]() Step 14: Edit the .env file
Step 14: Edit the .env file ![]() Open the .env file with your favorite text editor and replace the default values with your own settings. To save your changes in Vim, press
Open the .env file with your favorite text editor and replace the default values with your own settings. To save your changes in Vim, press Esc, then type :wq and hit Enter.
vi .env
For example:``
DATA_FOLDER=/root/n8n/ N8N_BASIC_AUTH_USER=myuser N8N_BASIC_AUTH_PASSWORD=mypassword SUB_DOMAIN=automate DOMAIN_NAME=mydomain.com SSL_EMAIL=myemail@example.com POSTGRES_USER=mydbuser POSTGRES_PASSWORD=mydbpassword POSTGRES_DB=mydb POSTGRES_NON_ROOT_USER=my_non_root_user POSTGRES_NON_ROOT_PASSWORD=my_non_root_password N8N_EMAIL_MODE=smtp N8N_SMTP_HOST=smtp.mailersend.net N8N_SMTP_PORT=587 N8N_SMTP_SSL=false N8N_SMTP_USER=user-from-mailersend@my-domain.tld N8N_SMTP_PASS=pass-from-mailersend N8N_SMTP_SENDER=n8n@my-domain.tld
N8N_BASIC_AUTH_ACTIVE=false
#EXECUTIONS_PROCESS=main
NODE_FUNCTION_ALLOW_BUILTIN=*
N8N_COMMUNITY_PACKAGES_ENABLED=true
NODE_FUNCTION_ALLOW_EXTERNAL=@types/marked,showdown,moment
Logging stuff to debug
#N8N_LOG_LEVEL=debug
N8N_LOG_LEVEL=warn
N8N_LOG_OUTPUT=console
EXECUTIONS_DATA_PRUNE=true
EXECUTIONS_DATA_MAX_AGE=168
N8N_DIAGNOSTICS_ENABLED=false
![]() Step 15: Create the data folder
Step 15: Create the data folder ![]() ``
``
mkdir /root/n8n/
![]() Step 16: Run Docker Compose
Step 16: Run Docker Compose ![]() ``
``
docker-compose up -d && docker-compose logs -f
This command will start the Docker containers in the background and display the logs. That’s it! The n8n instance should now be up and running on your specified domain. ![]() Please note that you will need to have Docker and Docker Compose installed on your system to run these commands. The install_docker_compose.sh script included in Step 3 will take care of this for you on Ubuntu.
Please note that you will need to have Docker and Docker Compose installed on your system to run these commands. The install_docker_compose.sh script included in Step 3 will take care of this for you on Ubuntu.
![]() Step 17: Access N8N Once the installation is complete, you can access N8N by going to
Step 17: Access N8N Once the installation is complete, you can access N8N by going to https://automate.yourdomainname.com. You’ll need to replace yourdomainname.com